Vinyl-BlogPhoto17Shakes-resized-600

The homeowner considering residing a home is faced with more than half a dozen choices as to the material that should be used.  The decision that the homeowner ultimately makes is an important one because a home is probably the biggest investment a person makes, and the choice of a siding which will protect that home that investment is one of the most important decisions that a homeowner is faced with.

This article does not attempt to sell the homeowner any particular type of home siding.  The purpose of this article is merely to provide the homeowner with as much unbiased information as possible about one particular type of siding vinyl siding so that the homeowner can include this information when making an informed decision.  So here are vinyl siding pros and cons.

Vinyl siding has made huge strides in just the past few years.  Many old notions of vinyl must be discarded and the cedarimpressions-resized-600homeowner needs to come to this discussion with an uncluttered perspective.  From an aesthetics standpoint, today’s vinyl mimics the look of real wood much more realistically than the faux-wood vinyl panels of just a few years ago.  One of the reasons some people disliked the vinyl panels of even ten years ago was the fact that the panels had a seam in them that destroyed the illusion that they might be wood.  Today’s vinyl has no seams and the texture of the panels looks more like wood than ever.
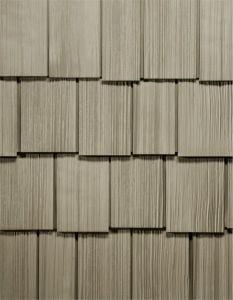
The true key to vinyl is the thickness of the siding.  Many homeowners are unaware that vinyl comes in at least three gauges or thicknesses, or that the gauge of the siding they choose determines how long their siding will last.  Obviously, the thicker the vinyl is, the thicker the gauge and the more the siding will cost.

The vinyl sold in many home centers is 40 to 45 gauge size.  This is adequate and can last 25 years or more in many climates.  However, for the homeowner who wants true durability and a siding that can last 40 years or more with little or no maintenance, a 55-gauge (.55 inch thick) siding is recommended.

Vinyl panels generally come fully painted, with the color infused with the vinyl itself so it cannot flake or chip off.  Homeowners can choose from a wide palette of colors, matching almost any color scheme the homeowner can come up with.  If just the right shade is not available in a pre-colored vinyl panel, vinyl siding can be painted any color that the homeowner chooses.

One of the primary reasons that vinyl has become “king” in the house siding world is that once the vinyl is installed, there is virtually no maintenance to perform for the next 30 or 40 years.

That is not to say that a vinyl panel attached to a home today will look just as good 40 years from now as it does now it will not, but if a homeowner does nothing to a 55-gauge panel for forty years, it could still do its job of keeping the home dry and safe in many climates.  And that is something.

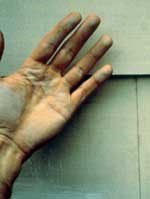
Of course, to keep a home’s vinyl siding looking good and relatively new, the siding will need to be washed at least vinyl-blogphoto01-resized-600once per year and painted every eight to 10 years.  Under the glare of the sun, the colors infused into vinyl panels do fade with time, so without a certain amount of care, such as occasionally repainting, vinyl siding does tend to look old after a few years.
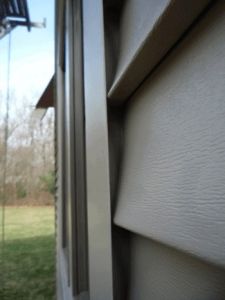
Another point to keep in mind is cost.  Vinyl is one of the least expensive sidings a homeowner can buy.  Not only are the initial costs less than virtually any other siding, but the installation is also fast and inexpensive as well due to vinyl’s lightweight and interlocking design.

Vinyl does have its drawbacks, however, and homeowners need to be aware of them.  For one thing, vinyl dents rather easily, even the heavier gauges.  An errant baseball, hail, or even a power wash can dent vinyl, and very often the dents do not pop back out no matter what the homeowner does.

If a panel is dented or needs to be replaced for any other reason, it can be extremely difficult, time-consuming and expensive.  Vinyl panels overlap, and because they are attached in an interlocking pattern, they can be extremely difficult to remove and it can be almost impossible to insert a new piece of siding.

Not only that but matching the color of an existing panel with a new panel can be virtually impossible unless the damaged panel is almost new.  The reason for this is that the colors permeated into vinyl panels fade over time, making a newly inserted panel stand out.  Also, it can happen that a manufacturer will cease manufacturing a certain color of panel, making it impossible to color-match an older piece of vinyl.

Cold can also be a vinyl killer.  In extremely cold weather, vinyl can become brittle and crack under the least provocation.  Cracks in the siding allow water to seep behind the vinyl and that can cause incalculable damage to the framing of a home.

There can be another problem with cold weather: vinyl does not insulate well.  This problem can be alleviated, at vinyl-blogphoto02-resized-600least to a large degree, by either wrapping the home with an insulating house wrap or putting heavy-duty insulation into each wall cavity before the vinyl is applied.  There is a thin insulating material that can be placed under the vinyl itself, but this does little in the way of actually insulating a home against either cold or heat.  The cost of additional insulation must be calculated into the total price of vinyl siding when making siding comparisons.
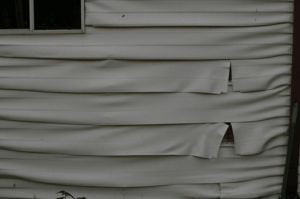
In extreme heat temperatures, vinyl siding can also melt and cause severe problems in locations where irregular weather patterns are the norm.

To sum up, the main advantages of vinyl are its low cost and ease of installation combined with its low maintenance.  Some homeowners are also pleased with the way modern vinyl panels look.  Drawbacks include being easily dented, the difficulty of replacing individual panels, color fading and potential cracking in extremely cold weather.  All of these factors must be weighed carefully against the pros and cons of other types of siding when making a decision as important as installing new siding on a home.

paintrollerwhite-resized-600

Exterior paint is subject to any number of events that can ruin its beauty and effectiveness.  There is good reason to pay strict attention to the preparation, type and application of the exterior painting project.  Paint is the home exterior’s first line of defense against the elements.  The proper surface preparation and paint application are the same regardless of the climate.  However, the type of paint used depends on the weather conditions where the home is situated.  Homeowners seeking advice about repairing damaged exterior paint should contact their local home remodeling contractor.  For many homeowners in Rhode Island, Massachusetts and New Hampshire, United Home Experts has been the go-to choice for their home remodeling needs.

Common causes of damage to the exterior paint include inadequate surface preparation, careless paint application, applying the wrong type of paint and structural problems that allow moisture to accumulate.  Prior to repairing damaged exterior paint, the underlying cause for the damage must be diagnosed and treated to keep it from recurring.  Following are some of the most common maladies befalling an exterior paint job.

Blistering

Blisters happen when water or solvent is trapped beneath the paint.  To eradicate the blister, it must be cut open to determine the culprit.  If there is bare wood under the blister, water caused it.  If there is solvent beneath, it was undoubtedly because the exterior painting took place in direct sunlight.

Should water be the cause of the blistering, the exterior of the home should be thoroughly inspected for loose or missing caulking around windows and doors that may have led to the blistering.

Peeling

Peeling occurs when the paint curls away from the wood.  Probable causes are painting over dirty or wet wood.  It PeelingPaintmay also be due to new paint being applied over loose old paint.
Alligatoring

This affliction is just as it sounds.  It is a condition with a pattern of lines and cracks resembling the skin of an alligator.  It happens when a second coat of paint is applied while the first one is not completely dry.  Alligatoring may also be a result of paint for the first and second coat being of different and incompatible types.

Wrinkling

Wrinkles have a saggy, droopy appearance and are caused by paint being too thickly applied.

Chalkingf

Interestingly, top quality paint is manufactured to chalk up so that in wet weather surface dirt is washed away.  However, chalking where the paint is removed by rubbing the surface indicates an unprimed surface or that the application of poor quality paint.

Repair and necessary supplies

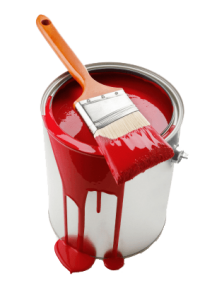
The repair for all of these conditions is the same, with the exception of the fix for blistering paint.  The blistered paint must be scraped and sanded right down to the bare wood before further steps can be taken.  Otherwise, the treatment for the damaged exterior paint is to scrape the paint off the affected areas and sand until smooth.  The area must then be washed with a detergent solution and thoroughly rinsed with water.  When the surface is dry, the primer coat can be applied.  If moisture was the cause of the damage, the primer should be a water-repellent variety.  Finally, a thin coat or two of the recommended,paintbucket high quality paint for the home’s climatic conditions should be carefully applied.
The supplies for the job are simple and include a stiff wire brush or paint scraper, fine and medium grade sandpaper, primer, paint, and paintbrush or roller.

Homeowners everywhere should not put off repairing damaged exterior paint.  The look and protective qualities of a properly painted and flawless exterior are important to the home and to those who dwell within.

There are many events in daily life that can damage the beauty of a home’s interior paint.  Following is a list of some of the most frequent types of interior painting flaws, along with their causes, how they can be repaired and the supplies required for each instance of damage.

Peeling Paint

The peeling paint woe is a very common one.  It normally occurs because of moisture underneath the paint.  PeelingPaintMoisture causes the paint to lose its adhesive quality, allowing the surface paint to crack and peel.

The peeling paint phenomenon is usually found in rooms where there is high humidity, such as the bathroom, kitchen or basement.  Leaky flashing around a chimney or exterior wall can also cause water to seep into the home’s interior.  This makes the plaster beneath the paint wet, causing the paint to separate from the wall.

Repairing damaged interior paint due to moisture begins with eradicating the cause.  The high humidity spaces should be ventilated with an exhaust fan to remove the moisture and expel it to the outside.

The home’s roof, walls and soffits on the exterior need to be properly ventilated as well.  Damaged or missing flashing around the chimney or any wall-roof connection need to be repaired.  Once the source of the moisture is found and eliminated, the interior painting can proceed.

To prepare the painting surface, all peeling paint must be scraped off and the affected areas sanded.  Once smoothed, a primer coat should be applied to the sanded areas.  When the primer is dry, a new coat of paint matching the existing wall paint can be brushed or rolled on.  These procedures, properly executed, will stop all further incidences of peeling paint.

The supplies required to accomplish this repair are sandpaper, primer, paint, and paintbrush or paint roller.

Mold and Mildew

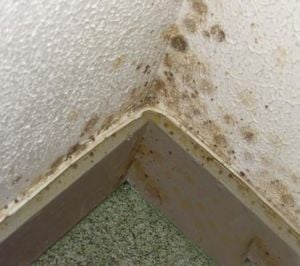
Mold and mildew is usually associated with a home’s exterior, but the interior of the home can be affected as well. MoldPaint Mildew is a fungus and appears as splotches on the paint surface in colors of grey, brown, green or black.

It, too, is caused by moisture and poor ventilation.  It can also be caused by painting over a surface that was improperly cleaned of previous mildew. Additionally, the use of low-quality, non-mildew-proof paint can be the culprit.

The treatment that solves the mildew problem involves scrubbing the affected area with a bleach solution of one part bleach to three parts water.  The solution must remain on the surface for 10 to 15 minutes, and should then be rinsed with plain, clean water.  The area is then washed again with a detergent and water solution followed by a thorough water rinse.  Once the surface is completely dry, it is painted with a quality interior paint.

The necessary supplies for successful mildew treatment are simple:  bleach, detergent, high-quality paint, and paintbrush or paint roller.

These problems, caused by excessive moisture and poor ventilation, are especially prevalent in areas with heavy rain and snowfall that may last for months.  The New England states are prime examples of these climatic conditions.  Homeowners in the states of Rhode Island, Massachusetts and New Hampshire should turn to the professionals at United Home Experts for their home remodeling needs whether for repairing damaged interior or exterior paint and many other home remodeling and maintenance projects.

Sagging or Running Paint

This damage gives the painted surface a droopy, uneven look.  The cause can be a too-heavy application of paint, paint-sagging1-resized-600paint overly thinned, or painting in an overly humid environment.  It can also be due to a lack of primer coat being applied and a dirty surface at the time it is painted.
To recover from this problem, should the paint still be wet, the paint can be redistributed using a brush or roller to smooth the droops.  Once the sagging paint has dried, it must be sanded to a dull finish so that the new paint will adhere.  Another fix is to apply a primer coat and repaint.

To avoid this problem altogether, the paint should be applied in two thin coats rather than one heavy one.  The necessary supplies for this repair are sandpaper, paintbrush and/or paint roller, primer and paint.

Of course, everyday accidents can cause paint removal in areas hit hard by moving furniture, or hit with force by any heavy object.  Anything constantly rubbing against a painted surface will eventually wear off the paint.  In all of these cases, the affected areas need to be sanded smooth and repainted.

Regardless of the extent or cause, repairing damaged interior paint can be successfully accomplished.  No homeowner, particularly those living in regions of extreme climatic conditions, need live with damaged interior painted walls.

Flashing

Flashing is a continuous series of thin pieces of sheet metal or other waterproof material that is installed to keep water from getting into a building from a vulnerable angle or joint. It typically operates under the principle that, in order for water to get through a joint, it must fight against gravity and work its way up. In the case of hard rain that is being driven by the wind, the driving force of the heavy rain would have to be diminished. Roof flashing can be installed in one of two ways. It can either be concealed or exposed on the outside of a building’s roof.

Flashing that is exposed is usually made of sheet metal like aluminum, copper, lead or lead-coated copper, painted galvanized steel, stainless steel, terne metal, or zinc alloy. This is how flashing got its name: the metal material catches the sunlight and reflects it, creating an eye-popping, flashing effect. Copper is one of the best metal materials to use for exterior flashing because it is durable and malleable. Using copper in any roofing project will ensure that no weak points exist in the roofing structure. As opposed to some other flashing materials, copper will not destruct if exposed for long periods to sunlight.

Concealed flashing is usually made of either sheet metal or a waterproofing membrane such as fabric made from bituminous coal or sheet material made from plastic. Which type of membrane is used really depends on the climate and on the building’s structural requirements. Aluminum and lead are not recommended for use as concealed flashing materials because they experience adverse chemical reactions when coming in contact with cement mortar.

There are two main kinds of roof flashing:

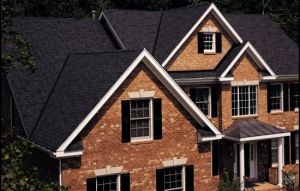
Flashing that is placed around objects that stick out from a building’s roof, like chimneys or pipes, to keep waterctr00prepdnlr0001m from pooling at joints or seams by forcing it to run off.
Roof penetration flashing is used around cables, pipes, and supports to waterproof these vulnerable areas by providing a protective barrier.

There are many types and brands of flashing available on the market, but homeowners may have trouble deciding between all the different brands and styles. Flashing is a difficult project that is essential to execute with great precision, so it is a good idea for homeowners to seek professional help rather than try to do it themselves. The flashing has to be carefully constructed and strategically placed so that water is definitely deflected away from the roof’s trouble spots and not into the underlying structure of the roof (and the home). Flashing installation done by nonprofessionals can lead to all sorts of trouble for the homeowner and the home, including mold, water seepage, leaks and structural damage.

The trustworthy professionals at United Home Experts are specially trained in all aspects of roofing, so they know all the best types of flashing and are able to install it correctly, ensuring a quality roof maintenance or construction job for any home. Homeowners can contact them for a free estimate and expert advice before undertaking any roof project. For more information about roofs, visit our main roofing page!

a

No industry, including the painting trade, can afford to stand still for long. One of the few constants is that everything changes. While many factors, some seemingly obscure, affect the public’s color choices and painting trends in indoor paint for the year, the one thing that most painting experts agree on is that for the next twelve months the growing strength of the economy and a generally hopeful outlook on the world will spark a resurgence of positivity and forward thinking when it comes to painting trends for 2013. Optimism will be the driving force behind interior color trends in the coming year.

According to Dee Schlotter, national color brand manager of Pittsburgh Paints, 2013 will see a move away from the grays and “depression era” colors of the last few years and into a more open, colorful and vibrant range of indoor paint colors.

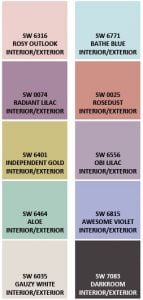
So what colors speak of optimism and the search for new horizons? The painting experts at Sherwin Williams, one of the top brands of paint in this country, see pastels as the new trend for 2013. When companies and decorators bspeak of today’s pastels, they are not referring to the ghastly pastels of the 1980s. The pastels for 2013 will be a lot creamier, a lot softer. Lighthearted colors, open and free, are all the rage, reflecting a new sense of calm and innocence.
According to Heartland Bold, the trend for the coming year is “big, bold, bright colors!” For example, a clean blue color with no green is one of the colors that is expected to be big in 2013.

Not every room needs to reflect this new bright and bold outlook. Some muted colors such as creams, beiges and similar introspective colors, and combinations reflecting a desire to gather the family around a safe and comfortable environment, are likely to continue for the next few years. However, the long-term trend in color is toward the brighter, more outgoing shades that reflect a new boldness, an optimistic outlook on life and the world in general.

Many color design specialists see a mixing of light and dark colors in the same room, or in adjoining living spaces cas a possible trend. Such eclectic mixing of colors and moods is emblematic of new-thinking ideas. Combined with paint color trends away from the somber, accent colors will also be much more lively and upbeat in the coming year. Look for trim colors to be lighter and more bold, and look for fabric designers to follow suit, creating pillows and other accent pieces that scream out for attention.

Homeowners who want to take advantage of this new thinking in terms of interior paint should consult the painting experts at United Home Experts. The color experts at UHE are well-versed in all of the latest trends and they carry only the best paints with long-term guarantees. Homeowners in the New England area can count on UHE for free, expert painting advice with no obligation to purchase.

As our country lifts itself out of its economic woes and shakes off the old ways of thinking to embrace a new and brighter future, so, too, is the collective American psyche gearing up for a brighter and more colorful future, a future bright with hope and dreams and – above all – a new optimism that will be reflected in its choice of paint for its living area. Welcome to the optimistic – and bright blue – new world of 2013. For more information about interior painting, visit our main painting page!

Bay windows extend outward from the wall of the structure, creating a nook in the interior of the room.  The andersenwindows are generally located on the first level of the building and may extend all the way to the ground below.

Bay window styles and designs are numerous and each of them adds distinctive architectural interest to an otherwise bland exterior.  While the windows are usually associated with Victorian-style buildings, they lend grace and charm to many architectural styles, whether historic or contemporary.

Homeowners in the New England states of Massachusetts, Rhode Island and New Hampshire interested in replacement bay windows should look to the home remodeling professionals at United Home Experts for their window replacement needs.  The UHE staff is thoroughly experienced in window installation and can give advice on various styles and manufacturers of bay windows.

Now that the definition of what constitutes a bay window is clear, following is a description of a few of the bay window styles and designs the homeowner might want to consider discussing with a local window replacement contractor.

The Oriel Bay

This type of bay window defies the first-level placement rule stated earlier, as they are commonly found on the upper story of the building.  Oriel windows are generally placed over the entrance to the building and are usually supported by stone or brick brackets or corbels.  They are representative of the Gothic Revival style of architecture established in England in the mid-18th century.  The term “oriel” is from the Latin word for porch.

The Box Bay

Box bay-style windows, as the name implies, are shaped like a box.  The windows consist of a set of three BoxBayWindowwindowpanes capped by a small roof.  The usual design is a large center windowpane flanked by two smaller panes.  The box bay window is a perfect way to open up space without repositioning any walls.  These windows are very often seen in combination with an interior window seat.

The Circle Bay

These windows are larger than the oriel style and more embellished than the box style.  The circle bay also incorporates more panes than the box bay and is apt to feature the application of elaborate and intricate moldings.  They can be up to six feet high and may extend CircleBayWindowoutward from the building by two or three feet.  This window style takes great advantage of a view and lets in much natural light.  Many are capped with a cone-shaped roof.  This window came into its own during the Queen Anne Victorian era of the 1870s.
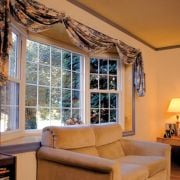
The Bow Bay

Bow bays can be located on any level of a structure and are gently curved rather than straight-sided like the other bay styles.  They are generally created by combining four or more casement windows together to form an arch.  The casement panes are attached to the livingroomframe with hinges on the sides of the windows.  The bow bay window first appeared in 18th-century England and the American Federal Period.

While these bay window styles all add interest to the exterior of a building, they also serve to enhance the interior of the building by expanding the space and letting in light to brighten it up.

Because painting the exterior of one’s home is best done under certain weather conditions, one must consider the 71time of the year in which to paint the outside of one’s home.  Ideally, one should begin painting when the weather is dry and the temperature is not extreme, typically from the spring to the fall.  However, circumstances may arise that convince a homeowner to paint the home outside of the painting season, and in such a case certain precautions are necessary to ensure the exterior painting is done effectively.

Best Time to Paint Exterior

In the past, it was generally thought that one should not paint when temperatures were below 50 degrees Fahrenheit, though with the improved quality of paint, especially premium paint such as Sherwin-Williams, one may paint with temperatures as low as 35 or 40 degrees.  The paint may also be sensitive to large swings in temperature in a relatively short period of time, as for example when the daytime temperature reaches over 100 degrees and the nighttime temperature reaches below 50 degrees.  It may thus be advantageous to select a time of the year without such temperature extremes in a single day. Temperatures may be most consistent during the fall in some parts of the country.

One may paint the exterior of one’s home during the winter season, though it may present certain challenges.  A painting contractor may simply paint when the opportunity arises, taking breaks when it gets too cold or snowy.  Because business may slow down during the winter months for many contractors, homeowners may get better deals when hiring them during the winter.  Another advantage to painting one’s home in the winter is that it may be the driest season in some parts of the United States, such as the Northeast.  In warmer parts of the country, the optimal time may be year-round.

Choosing the Right Paint

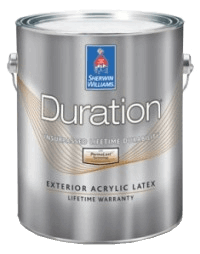
Regardless of the season that is chosen for exterior painting, it is important that a premium paint, such as SWPaintCanSherwin-Williams, be used.  Consumer Reports has rated Sherwin-Williams paints among the highest quality paints for the exterior of one’s home.  In tests of durability and appearance, Sherwin-Williams has consistently scored among the best, and it is among the most preferred by reputable painting contractors, such as United Home Experts.  Because painting one’s home can potentially add significant value to it, it is important to consider the type of paint used, as well as the quality and reputation of the company doing the painting.

Another factor a homeowner should take into account is the damage to a garden that may be caused by traffic when painting.  One should therefore fix up the garden after the painting job is finished, to avoid having to redo the garden.  Planting new flowers and mulching after the painting job is finished will complement the painting and add beauty to the home.

Choosing the Right Company

For selecting experienced professionals to paint the exterior of one’s home, United Home Experts will get the job done in a cost-effective and efficacious manner.  United Home Experts can schedule an appointment at one’s convenience in order to provide a quote.